Zoom Manual
Please make sure you make reservation before the meeting.
Zoom Guide
Setup Meeting

01. On the PC run Zoom which is located on the desktop
02. Select Join a Meeting
03. Enter the Meeting ID (Please confirm which room you reserved)
04. Enter the Password corresponding to the Meeting ID.
05. Please Join Audio.
06. If you are using a polycom in the conference room, click the upper tab Phone Call
On the Polycom, dial either one of the two numbers provided and follow the audio instruction
How to change your name on Zoom before or during a meeting
[To chaneg your name when you join]
Start Zoom Client, and click Join a Meeting
Enter your name in Your name filed.
*Make sure to enter your name (not your login ID) so host and other attendees can recognize you.

[To change your name during a meeting]
1.At bottom of Zoom window, click on Paticipants
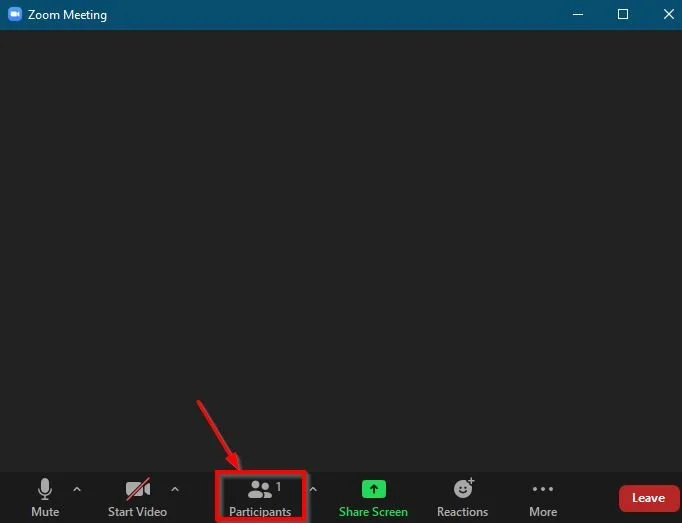
2.Hover your mouse over your name in the Participants list on the right side of the Zoom window. Click on More > Rename

3.Enter the name you’d like to appear in the meeting and click OK
*Make sure to enter your name (not your login ID) so host and other attendees can recognize you.

Screen Share

01. To share screen click Share Screen located on the bottom

02. To stop sharing the screen click Stop Share located on the upper screen
Connect to Polycom (Video Conference Device)
[From Polycom Side]
1.Call below number (All number is available, but please call nearest place)
162.255.37.11 (US West)
162.255.36.11 (US East)
221.122.88.195 (China)
115.114.131.7 (India)
213.19.144.110 (EMEA)
2.When Meeting ID input screen shows, input meeting ID. (Please share the Meeting ID beforehand.)
[From Zoom Side]
You can access to Room ID as usual.
End the Meeting

01. To end the meeting click Leave Meeting located on the lower right corner

02. Click Leave Meeting again
Add a Virtual Background
The Virtual Background feature allows you to display an image or video as your background during a Zoom Meeting.
You can upload your own images as a virtual background.
To add a virtual background:
Join the meeting
Click the green shield icon (top left-corner)
Click Virtual Background
Click + to Add image
Choose your background picture
After you select an option, that virtual background will display during your meetings.
Note: To disable the Virtual Background, choose the option None.
Claiming Host Using the Host Key
Follow these steps if you need to claim the host role when you join a Zoom meeting.
Join the meeting
Click Participants
Click Claim Host at the bottom of the participants list
Enter the host key (HELPDESK can provide the host key for your department)
Click Claim Host
Once the host key is verified, you will have host controls in the meeting.
After becoming a host, you will see below host-only functions at bottom of Zoom meeting window.

In-meeting security recommendation
Below are list of Zoom’s security features recommended. It’s strongly recommended to use those features to enforce in-meeting security.
Prerequisite: You need to claim yourself as a host to use these features. See “Claiming Host Using the Host Key” section above for how to become a host.
host a meeting
As much as possible, when conducting a meeting with external users, host a meeting so we can use our Zoom account. By hosting a meeting, meeting logs can be gathered. If the meeting is hosted by external party, no meeting logs are kept.
Lock meeting
To block unknown attendees to join the meeting (or avoid accidental join), lock the meeting once all attendees have joined.
To lock a meeting, click on Security icon at bottom of Zoom meeting window, then click Lock Meeting.

Remove unkown attendee
Review list of attendees and if you notice any unknown attendee, force leave the attendee by removing them.
Important Note: Removed attendee won’t be able to re-join the meeting.
1.Click Paticipants at bottom to show list of attendees.

2. From the list of Participants, hover your mouse over to the attendee you’d like to remove, click More > Remove

Click Remove to confirmation popup. As an option, you can report to Zoom.

Never post confidential infomration to chat
This doesn’t require you to be a host. Please make sure you NEVER post confidentail information to meeting chat.
enable waiting room
By enabling Waiting Room, host can review the attendees before they join and admit only the known attendees.
Click on Security > Enable Waiting Room

You will see You have enabled the Waiting Room message when it’s enalbed.

2. When attendees attemps to join the message, you will be notified with below message. ClickView to check identity, then once you confirm the attendee is legitimate, click Admit to let them in.

If you are displaying Participants list, you will see attendees at Waiting Room like below.

To disable Waiting Room, click on Security, then click Enable Waiting Room option to uncheck it.

Below message will be displayed once it’s disabled.

Inquiry
If you have any question or problem, please contact Helpdesk.
> [HELPDESK REMOTE SUPPORT]